Imagine losing control of a website overnight. While WordPress auto-updates aim to improve security, they can also bring serious risks if not monitored properly.
An automatic WordPress update could trigger unexpected issues — breaking themes, crashing plugins, and causing downtime (all without warning).
That’s why many professional website owners choose to disable WordPress auto updates and manage updates manually.
This comprehensive guide explains exactly how to disable WordPress auto updates safely, using plugins and manual methods.
By the end, readers will have full control over their WordPress sites and peace of mind knowing their website is safe.
Spread the love!
Let’s dive in and take control.
Why Disable WordPress Auto Updates?
While keeping WordPress up to date is essential, automatic updates don’t always guarantee a smooth experience. Without manual control, a single unexpected update can break a site’s functionality or cause serious downtime. This is why you should choose to disable WordPress auto updates, to prevent risks like:
- Plugin or Theme Conflicts: Updates may clash with installed plugins or custom themes, leading to critical errors.
- Unplanned Downtime: A failed update can cause the entire website to crash, affecting both traffic and revenue. For eCommerce and business sites, even short outages can translate into lost sales and trust.
- Loss of Custom Changes: Custom code or tweaks made to a theme or plugin might get overwritten without warning.
- Performance Issues: New updates sometimes introduce bugs that negatively impact website speed and performance.
Taking control of updates allows website owners to carefully test everything before applying changes, ensuring a safer, more reliable WordPress experience.
Methods to Disable WordPress Auto Updates
Disabling automatic updates in WordPress isn’t complicated, but it’s important to do it the right way to avoid security risks. Not a tech expert? No worries! Start with simple methods and work your way up to advanced techniques. Choose the one that fits you best.
1. Disable WordPress Auto Updates Using a Plugin
For non-technical users, using a plugin like Easy Updates Manager is the fastest and safest method. This plugin allows users to fully manage all update settings from a clean dashboard.
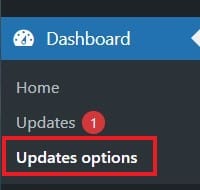
After activating the plugin, go to Dashboard > Updates Options.
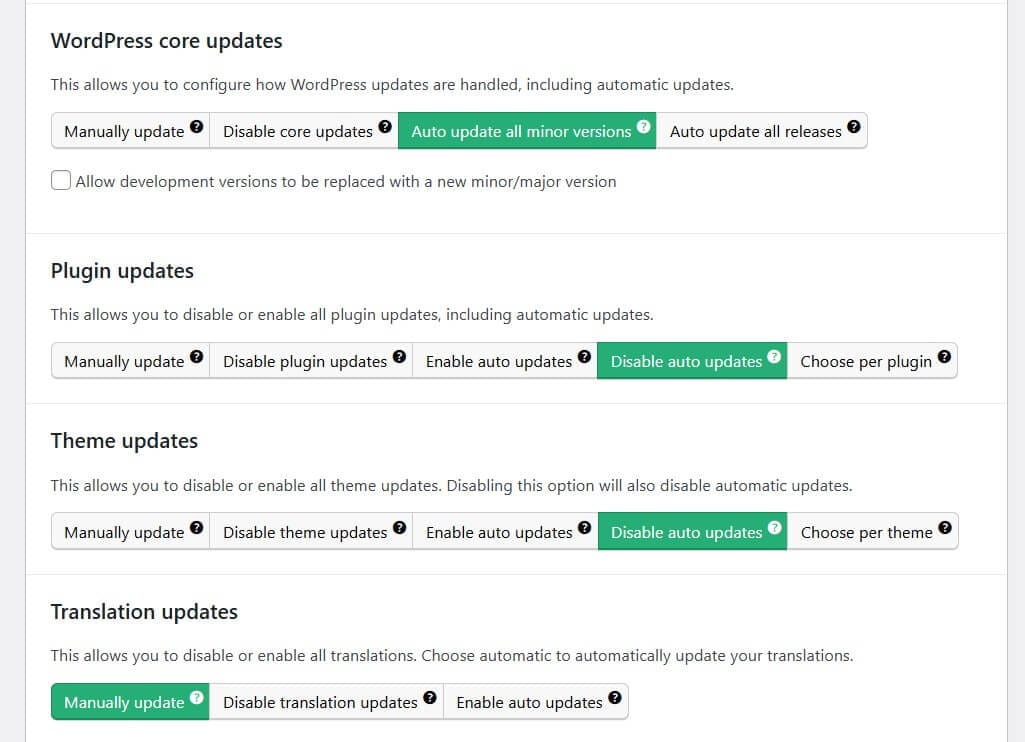
You can disable all updates right away, but it’s better to avoid that option, as it also hides notifications for important fixes and security releases. Instead, adjust settings individually: let WordPress handle minor core updates automatically while you manually update plugins and themes on your own schedule.
2. Disable WordPress Auto Updates using Code Snippet Plugin
This method is ideal for users seeking simple, lightweight control over updates without the need to install multiple plugins or without touching any core files.
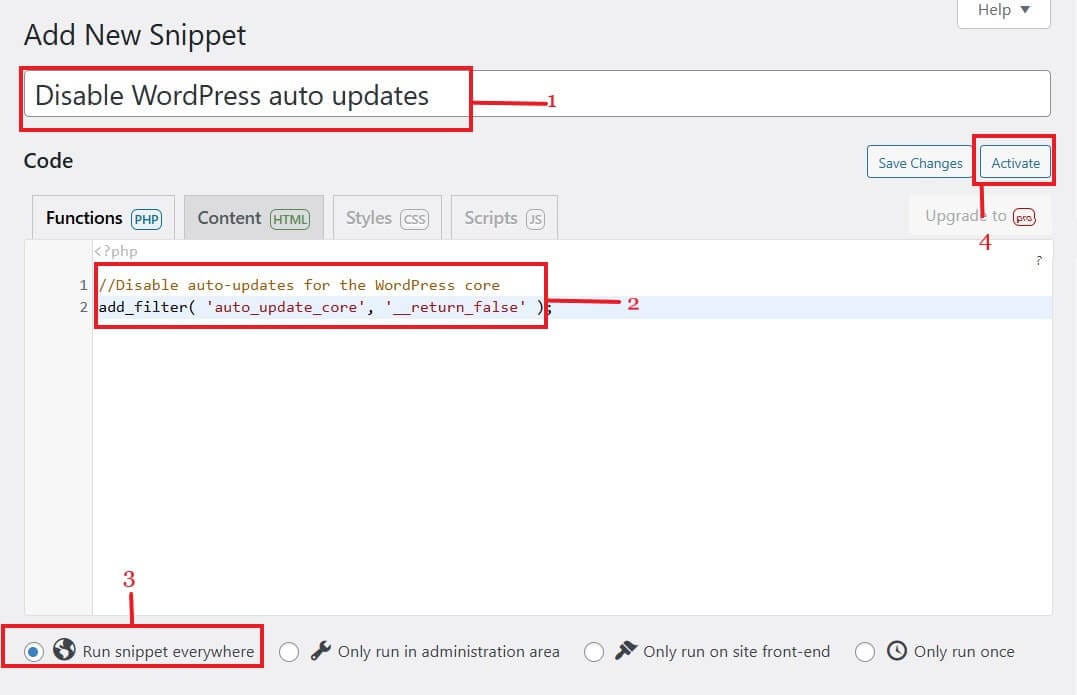
Install and activate the Code Snippet plugin. Go to Snippets > Add New and add the following snippet:
add_filter( 'auto_update_core', '__return_false' );To also disable auto theme updates, use:
add_filter( 'auto_update_theme', '__return_false' );To disable auto updates for plugins, use:
add_filter( 'auto_update_plugin', '__return_false' );After that, select Run snippet everywhere and click Activate.
3. Disable WordPress Auto Updates using wp-config.php
If you want total control and less plugin dependency, editing the wp-config.php file is an advanced option.
Steps:
- Access site files via FileZilla or your hosting panel.
- Open the public_html folder and find the wp-config.php file.
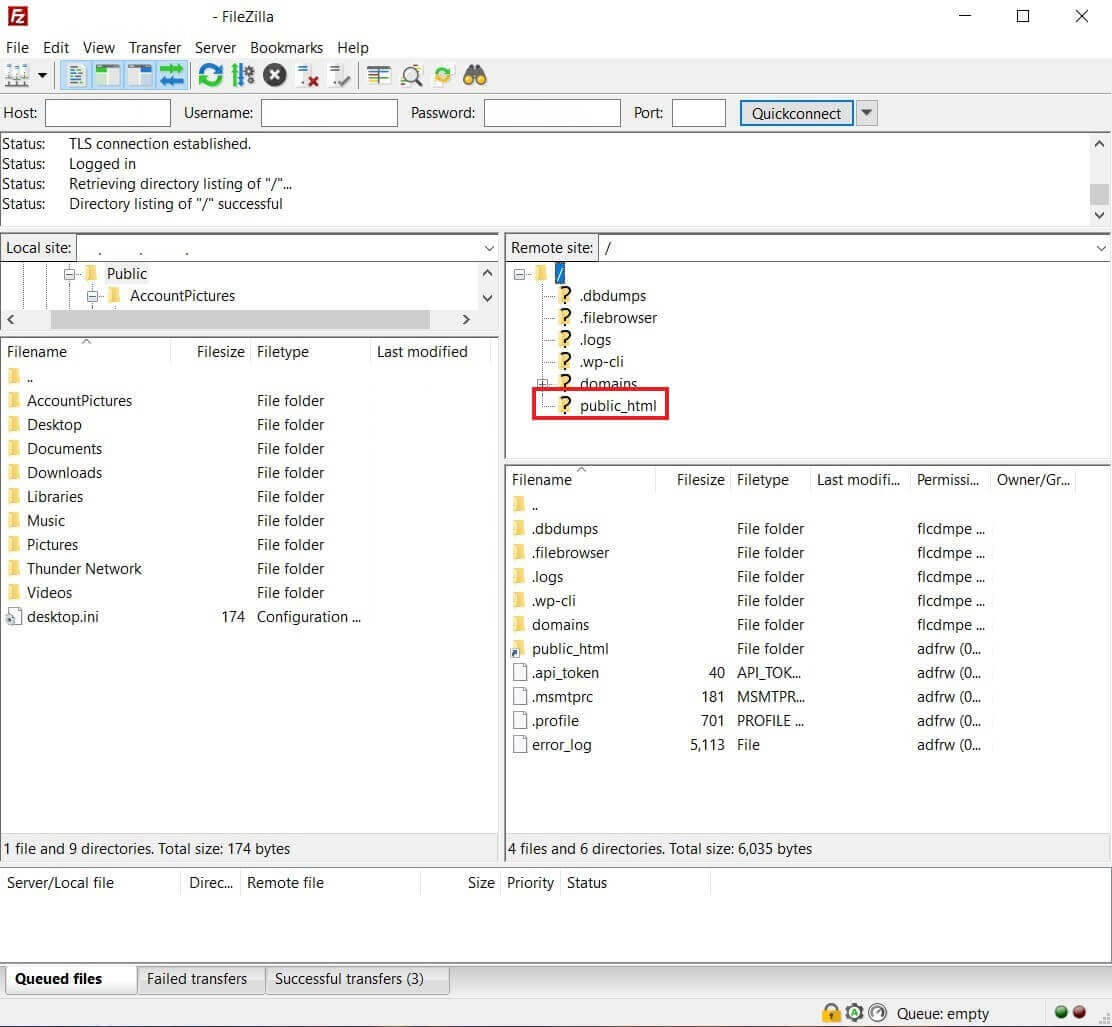
- Right-click on wp-config.php and select Download.
- Open the downloaded file and insert This Line Above “That’s all, stop editing!”:
define( 'WP_AUTO_UPDATE_CORE', 'false' );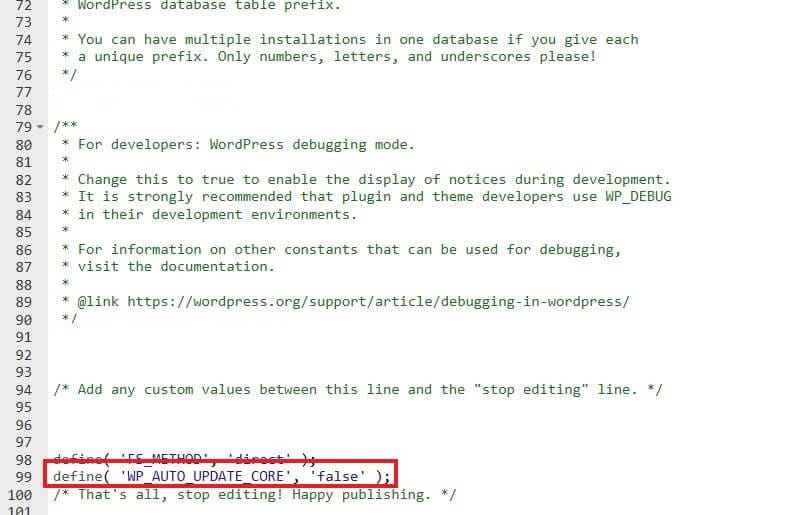
- Save and re-upload the file.
- Choose Overwrite if prompted.
Disable Auto Updates for Plugins
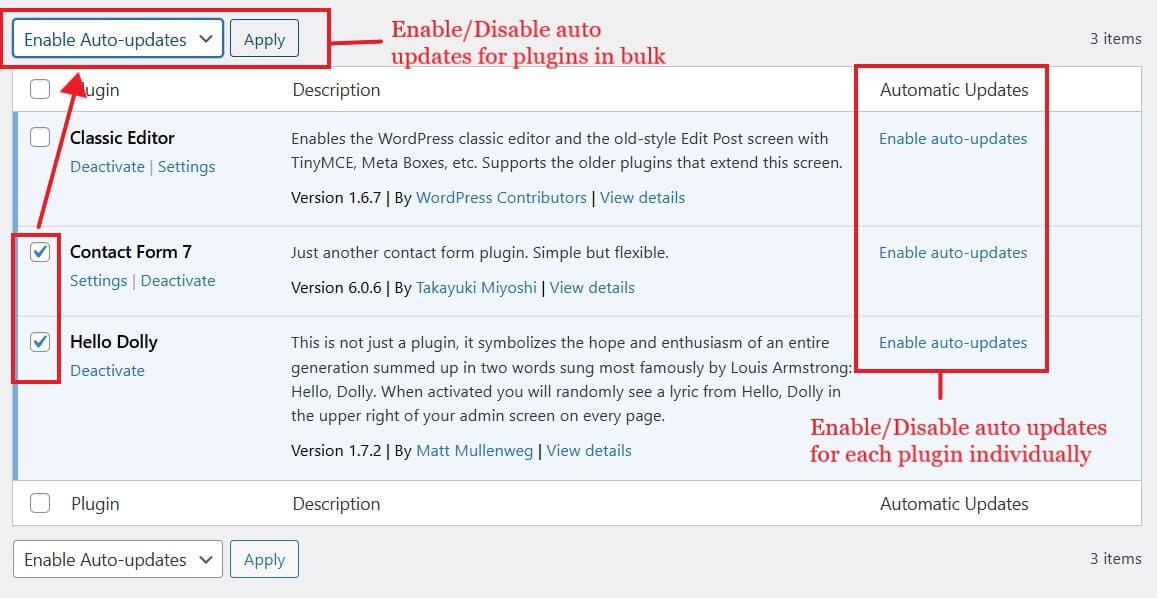
Maybe you only want to stop plugins from updating automatically. WordPress allows you to manage this directly:
- Go to Plugins > Installed Plugins.
- Turn off/on Auto-updates individually or use bulk action.
Disable Auto Updates for Themes
Prefer your theme updates to stay manual? WordPress lets you toggle that too.
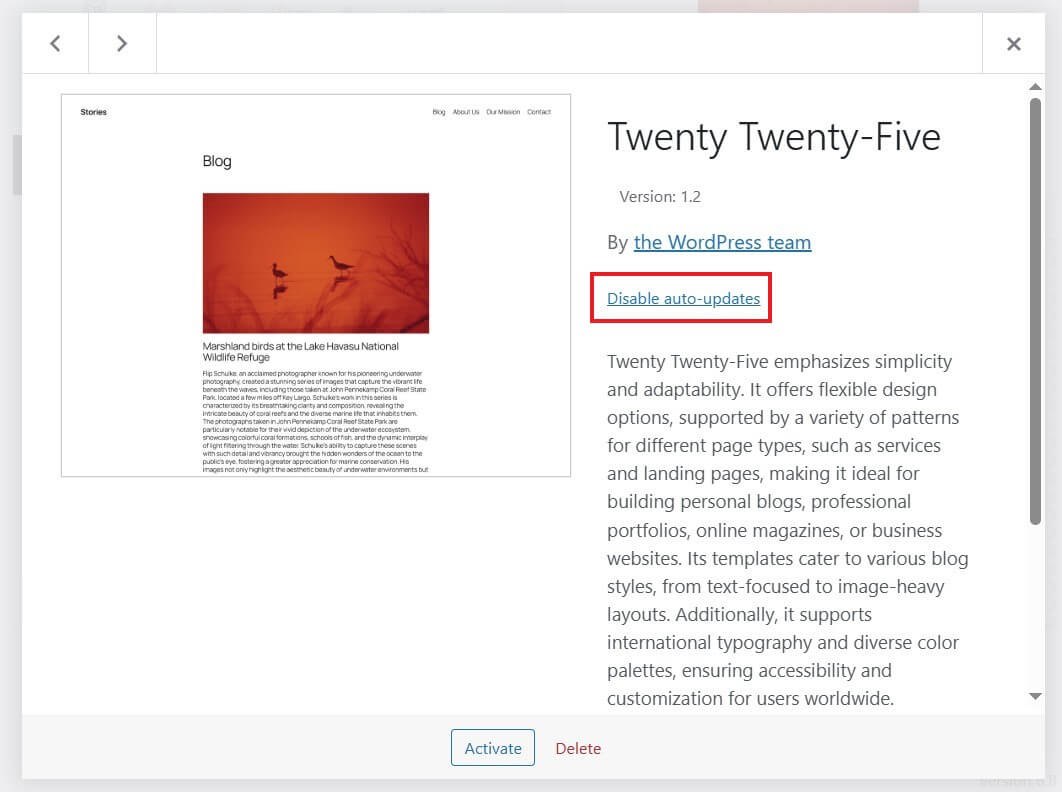
- Go to Appearance > Themes.
- Open Theme Details or simply click on a theme.
- Disable Auto-updates.
Now you will get a notification asking to update that particular theme or plugin every time the update is available, and you can manually update it.
Best Practices After You Disable Auto Updates
Take control of your WordPress site’s updates with a proactive approach. Once auto-updates are disabled, it’s crucial to stay on top of manual updates to avoid security vulnerabilities and ensure site stability.
✅ Manually update WordPress core, plugins, and themes regularly to keep your website running smoothly without unexpected changes.
🔄 Always perform a full site backup before applying any updates. Use any trusted plugin to protect your content and settings in case anything goes wrong.
🔐 Install any reputable security plugin to monitor your site for threats, especially when updates aren’t automatic.
Frequently Asked Questions
Conclusion
Disabling auto updates in WordPress isn’t about rejecting updates — it’s about choosing how and when they’re applied. For developers, bloggers, and business owners alike, this decision empowers them to test updates in a controlled environment, prevent compatibility issues, and maintain full visibility over their site’s health.
Ultimately, this approach puts website stability and uptime back in the hands of the site owner, where it belongs.
We hope this guide helped you take control of your WordPress updates! If you found this article useful, please share it with others.


