Ever wondered how to make your text look super neat, with perfectly straight edges on both sides? That’s called “justify text”. It means your content lines up evenly on the left and right, giving it a clean, symmetrical, and professional vibe.
Now, you might be scratching your head because the ‘Justify’ button isn’t usually there in WordPress anymore. It disappeared back in 2016 with WordPress 4.7. This wasn’t an accident. The WordPress team made this decision.
But don’t worry! We’ll cover everything from simple keyboard shortcuts and handy plugins to a bit of custom code. You’ll be a text-justifying pro in no time!
Classic Editor vs. Gutenberg (Block Editor)
Before we dive into the ‘how-to,’ let’s learn a bit about the two main WordPress editors: the Classic Editor and the Gutenberg (Block) Editor. Knowing the difference helps a lot when you want to justify text in WordPress.
The Classic Editor is like your old-school word processor. It used to have a justify button, but that’s gone now. The Classic Editor was specially designed for writers or bloggers.
The Gutenberg (Block Editor) is the newer kid on the block. Everything in Gutenberg is a ‘block’ editor, a paragraph is a block, an image is a block, and so on. This block system changes how we approach text alignment.
Why “Justify” Button Removed From WordPress?
In 2016, the WordPress team made a purposeful choice to emphasize content readability on various screens, such as phones and tablets.
When text is justified, WordPress has to stretch out words to make both sides line up. This creates awkward, uneven spaces between words, especially on phones or tablets.
These weird gaps are sometimes called “rivers” of white space. Plus, different web browsers used to display justified text inconsistently. WordPress wanted everyone to have a smooth, predictable experience.
How to Justify Text in WordPress Classic Editor
Even though the justify button isn’t built-in anymore, if you’re a fan of the Classic Editor, you’ve still got some easy ways:
If you’re testing on a local site, here’s a full guide on how to install WordPress locally.
Using Keyboard Shortcuts
Want a super-fast way to justify text? Keyboard shortcuts are your friend! Please note that these only work in the Classic Editor. Don’t try them in Gutenberg – they won’t do anything there.
Select the paragraph or chunk of text you want to justify.
Now, hit these keys:
- Windows users: Press Alt + Shift + J.
- Mac users: Go for Command + Option + J.
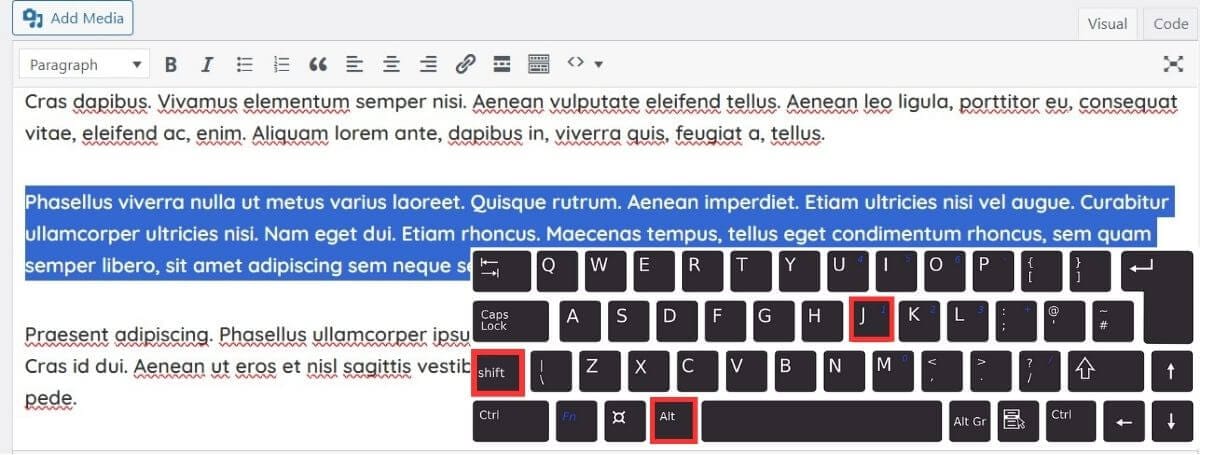
Boom! Your text should now be perfectly justified. Don’t forget to Save your post after changes.
How to Justify Text in WordPress Gutenberg (Block Editor)
You can use both CSS and plugins in Gutenberg to justify text. Let’s explore both methods and learn how to implement them.
Using CSS To Justify Text For Pages/Posts
To justify the text of the whole page or post. Open the page/post, press CTRL + SHIFT + ALT + M, or click on the three dots located at the top-right of the editor and open Code editor. Paste the following CSS code before the first line of code:
<div style="text-align: justify;">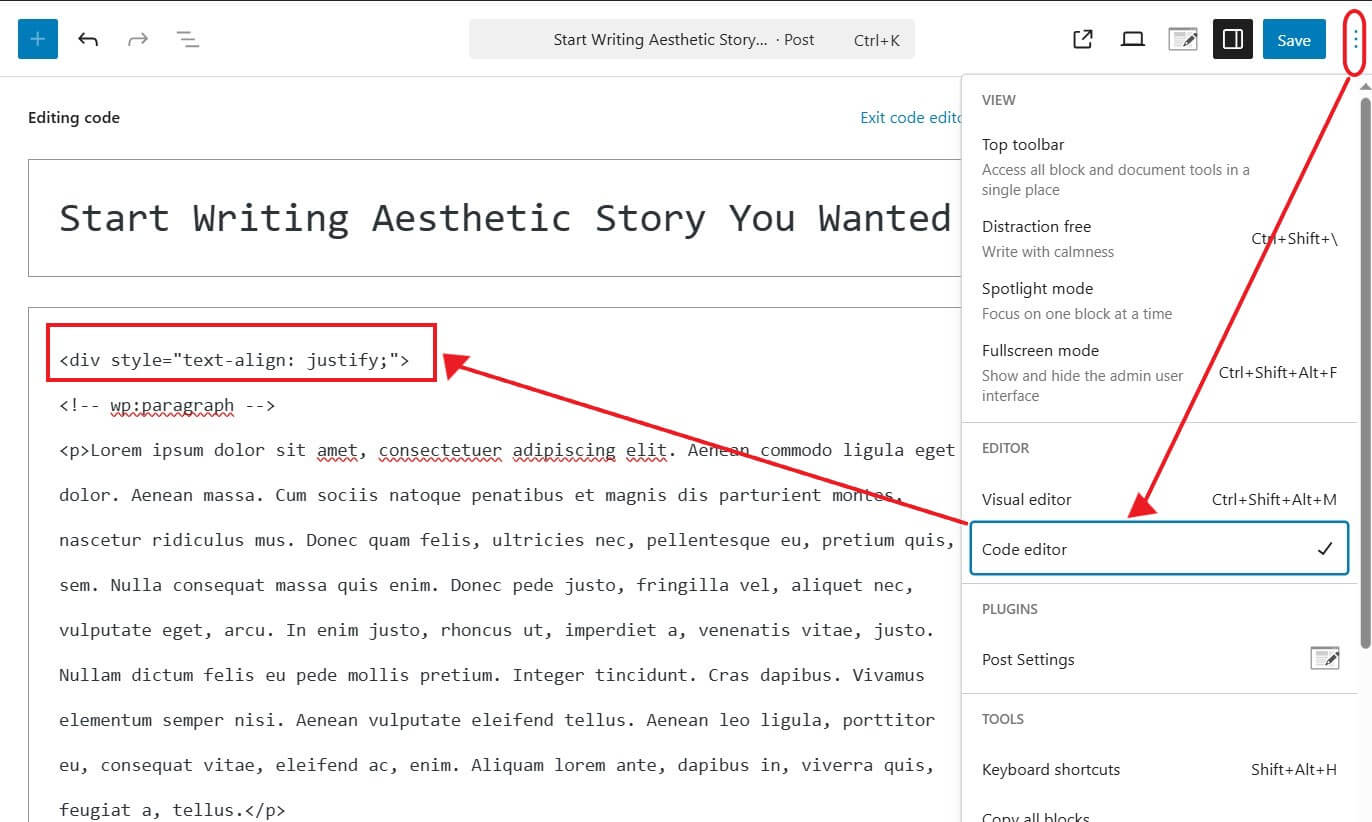
Paste the following at the end:
</div>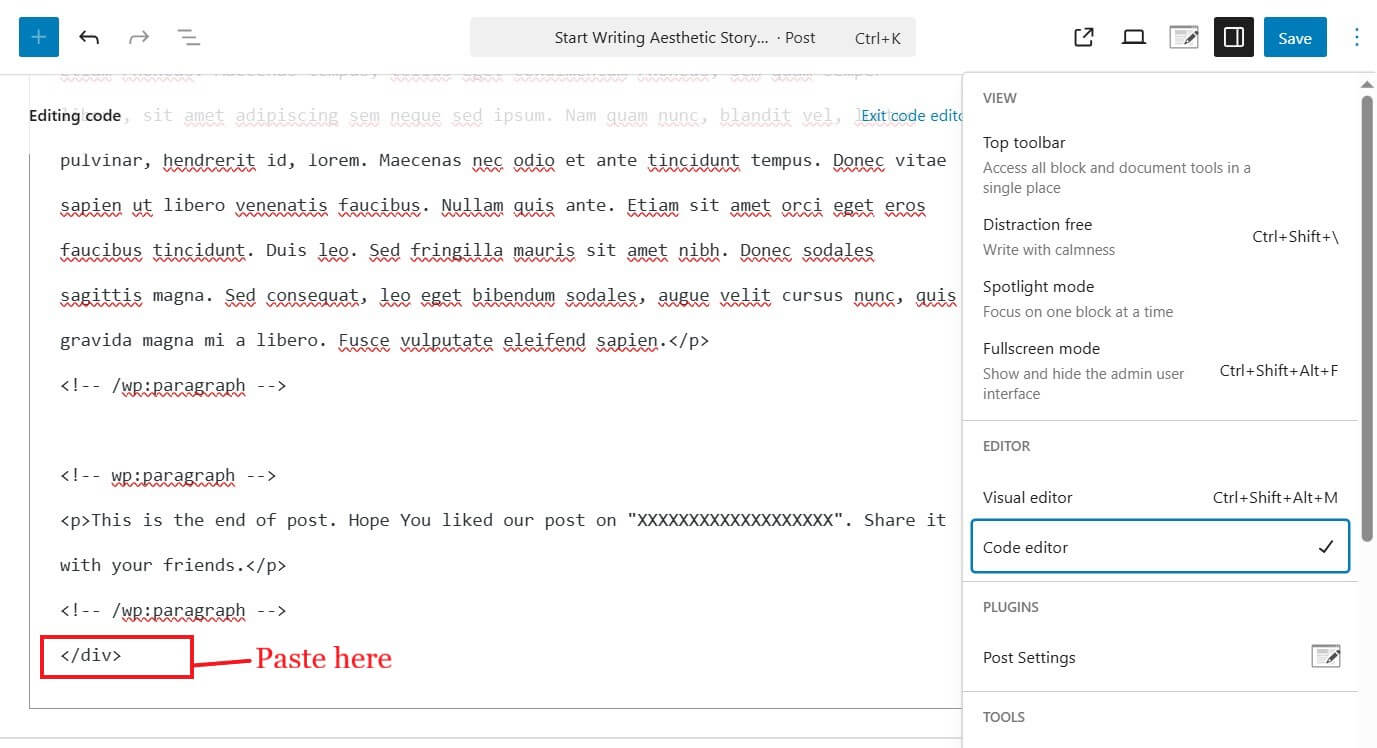
Don’t forget to Save the post after changes.
You can do the same for paragraphs also, paste the first line before “<!– wp:paragraph –>” and last line after it. You may only see the results on front-end.
Using Custom CSS To Justify Text For Paragraphs
This method is perfect for when you only want to justify a few paragraphs:
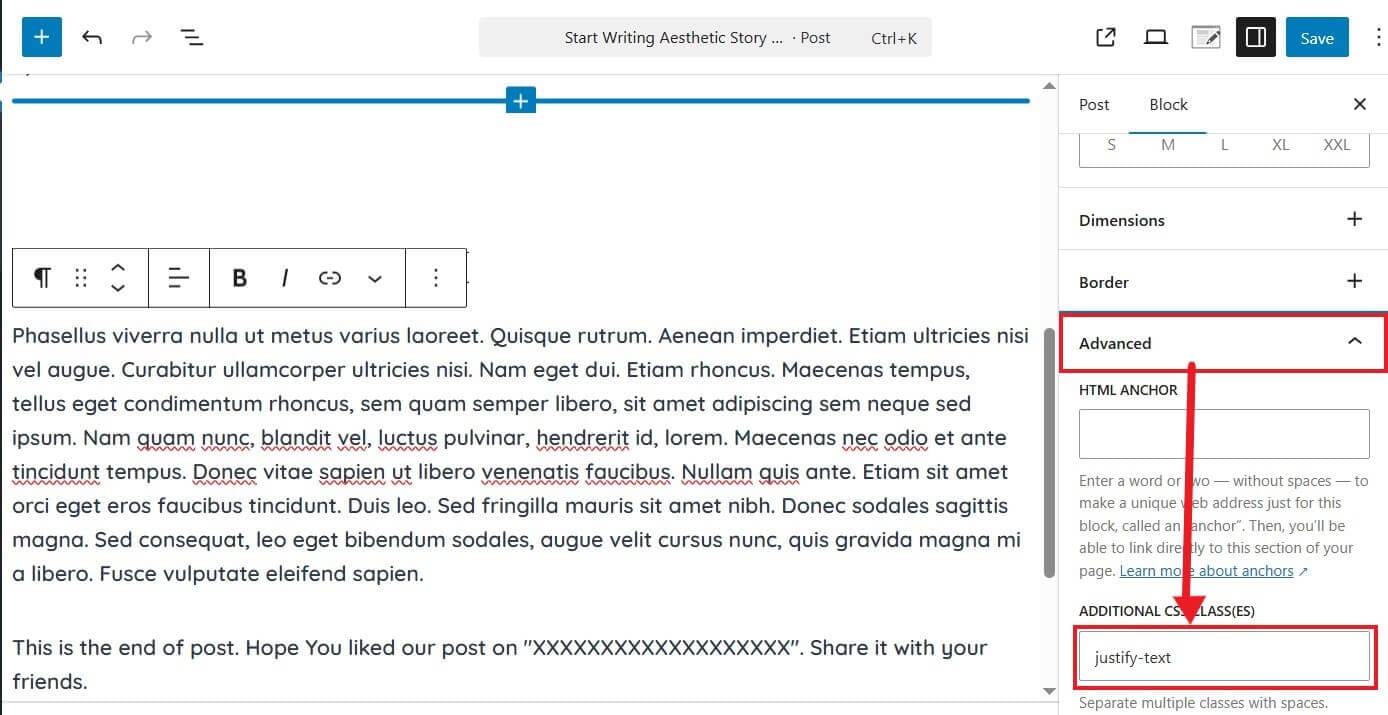
Select the paragraph or text you want to justify. Assign additional CSS class located under the Advanced tab and Save the post.
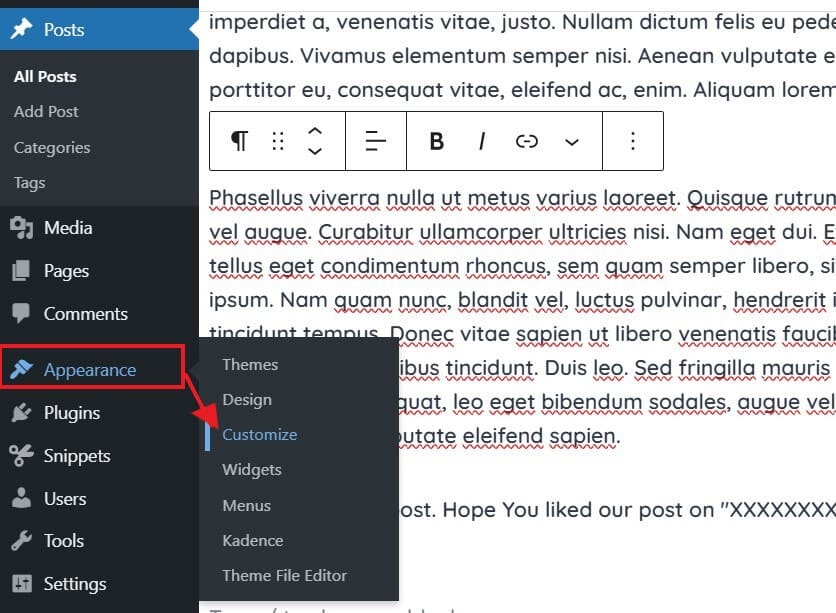
Go to Appearance -> Customize.
In the Additional CSS, paste the following code:
.justify-text {
  text-align: justify;
}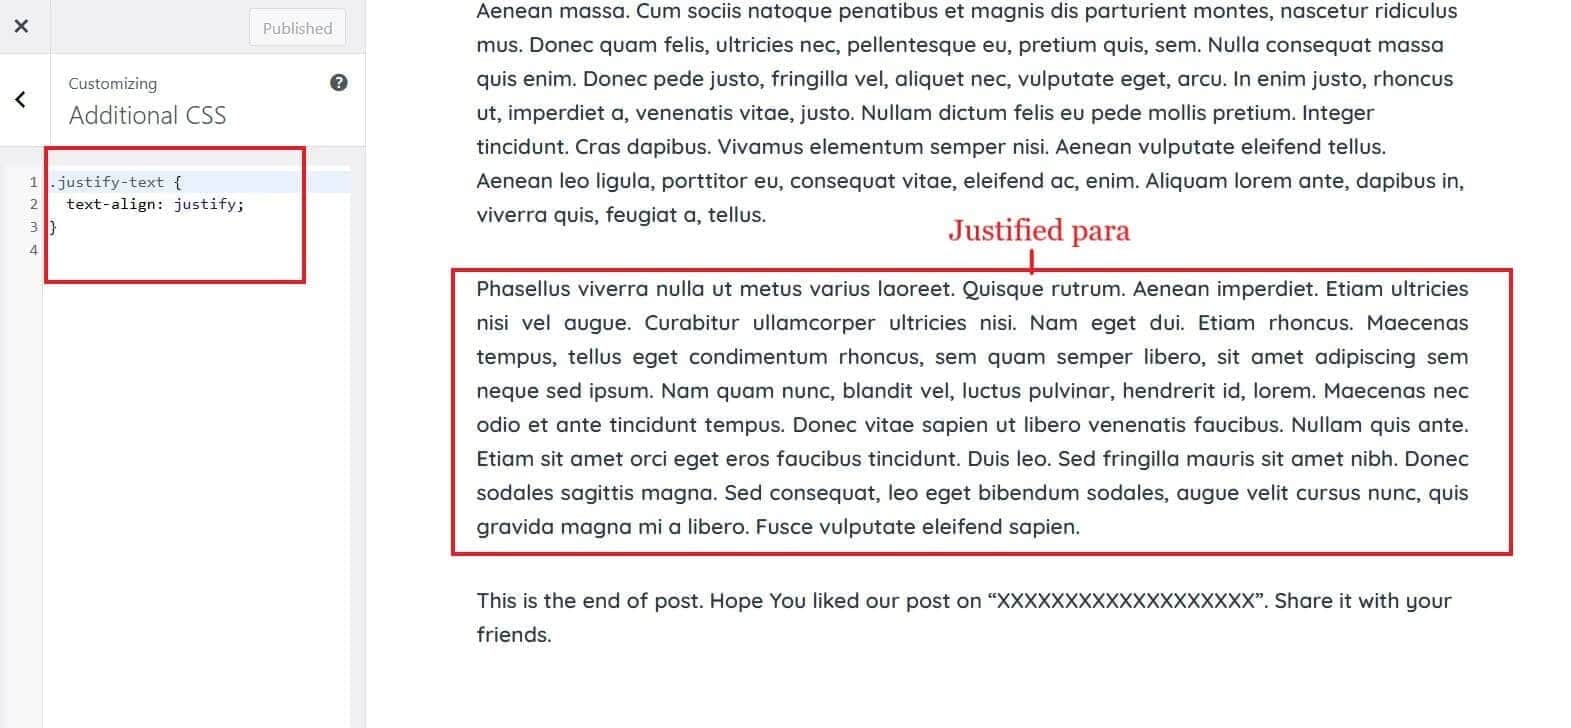
Remember, .justify-text is the additional class we assigned to that paragraph.
Using Plugins To Justify Text
There are a few plugins to justify text, but we have selected the user-friendly, lightweight, and one designed specifically to provide a justify button.
Steps to add a justify button with the plugin:
Navigate to Plugins -> Add Plugin and search for “Justify for Paragraph Block“.
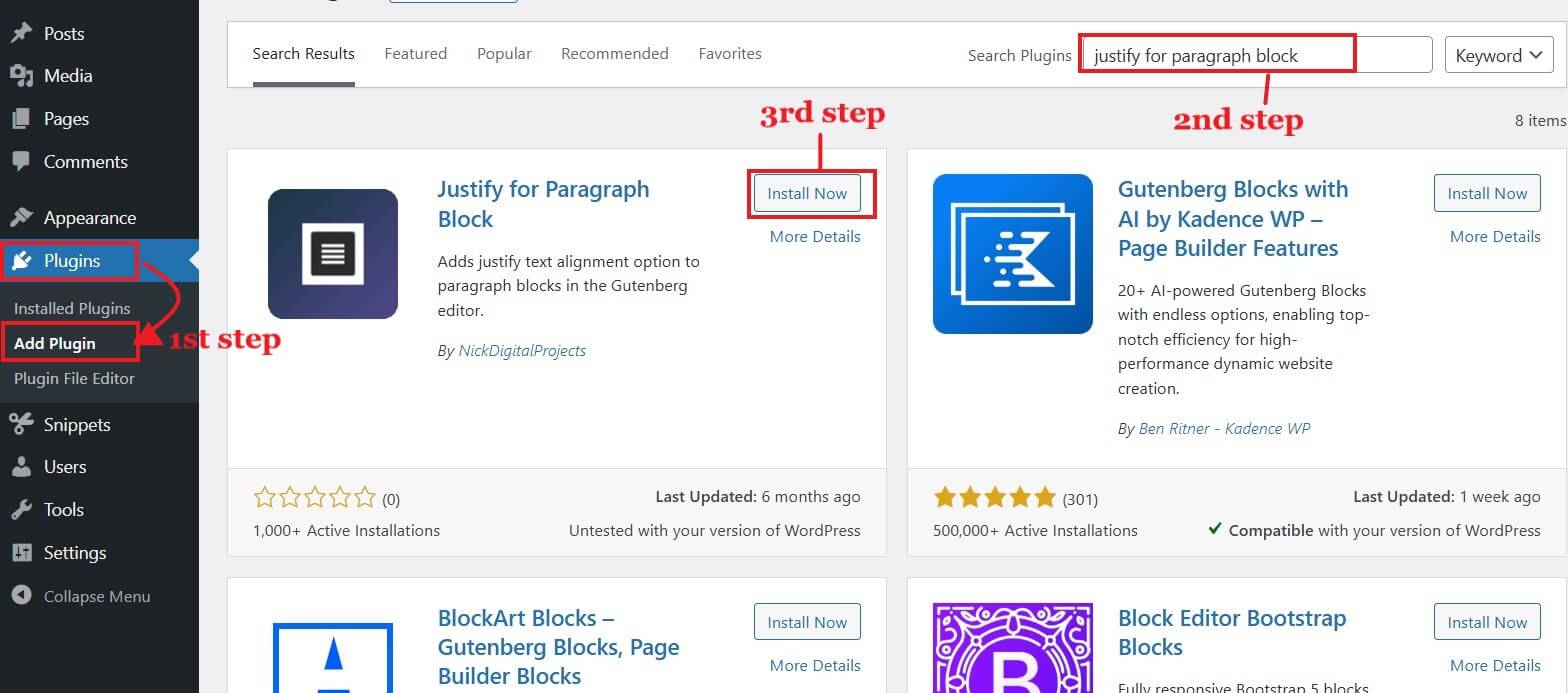
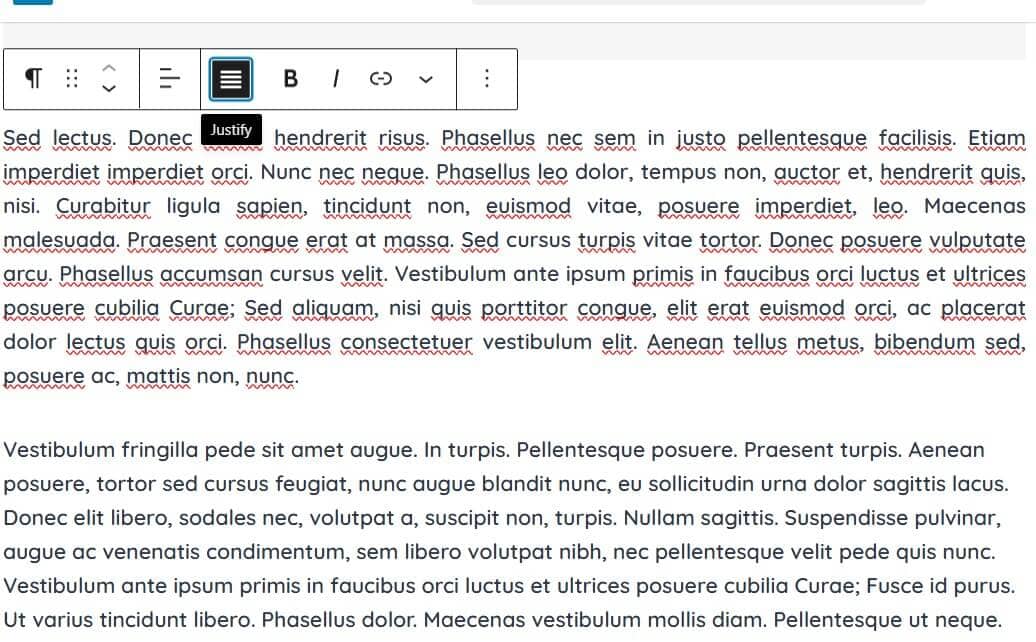
Install and activate the plugin. No need to configure anything, just open the post editor and you will see a justify button in the toolbar when you select any paragraph.
Site-Wide Text Justification with Custom CSS
Want to justify text in WordPress across your entire website? Custom CSS is your secret weapon! This method is super powerful because it changes your theme’s styling directly, making sure all your text looks consistently justified:
Navigate to Appearance -> Customize.
Open the Additional CSS tab and paste the following CSS:
.entry-content p {
	text-align: justify;
}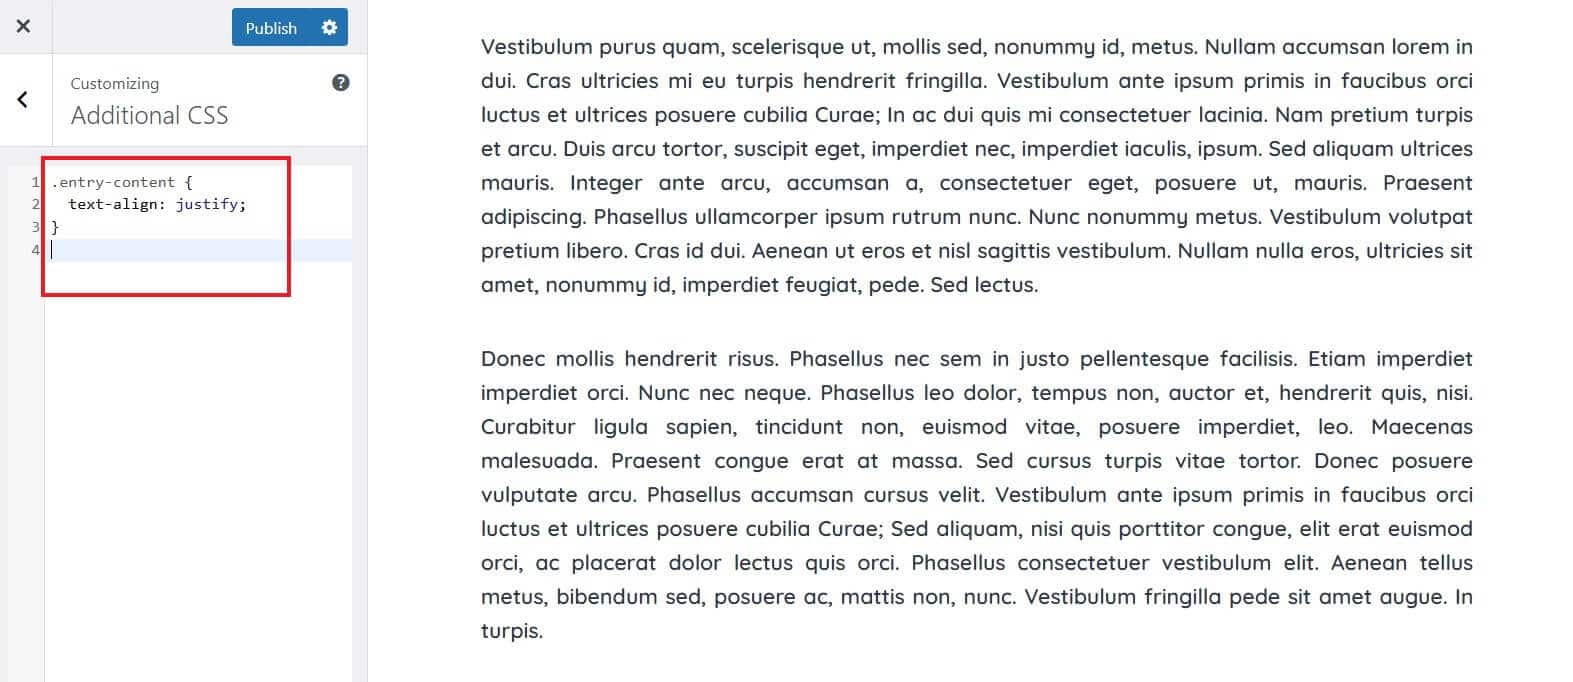
Now, all the paragraphs on the site will be text justified.
Frequently Asked Questions
Conclusion:
So, while the old justify button might be gone from WordPress by default, you now know there are tons of awesome ways to justify text in WordPress!
It’s super important to remember that while justified text can look formal and neat, especially like in print, it can sometimes make your web content harder to read.
Experiment with these methods to find what suits your content and website design best. By focusing on text alignment and readability, you’ll create a website that not only looks professional and polished but is also a joy for every visitor to read.
We hope we covered everything you need to know about justify text alignment in WordPress. If you have any questions or feedback, feel free to comment below.
If you found this guide helpful, share it with others who might benefit!


